Fibreboard Fun!
Owners of late Heralds don't have nearly as much fun as those of us with the early types. True, all Herald dashboards are made of substantially the same pressed fibreboard material. What's different with the early ones is that there's no vinyl covering, just a thick coat of "Portafleck" paint, a black finish with grey flecks in it. This means that any water getting gathering on top of the dashbard makes it warp, and ultimately decay.
I've planned in my mind how to fix these dashboards properly for some time, but there's always been a long list of other things to be done. Then along comes a paying customer who needs his dashboard repaired, so time to put the ideas into practice.
First job was to strip all the paint off the dashboard to see exactly what I was working with. Stupidly, I didn't take any photographs at this stage, possibly because I had doubts in my own mind that any of this was going to work! Initial surface removal was done with Nitromors stripper for wood, however I had to tread carefully for fear of the paint stripper soaking into the fibreboard beneath the paint. Most of the work was done the painfully slow way, with sandpaper and a delicate touch. Interestingly, sanding revealed what appeared to be body filler in the corners. This appears to be part of the original construction, though I find it hard to believe.
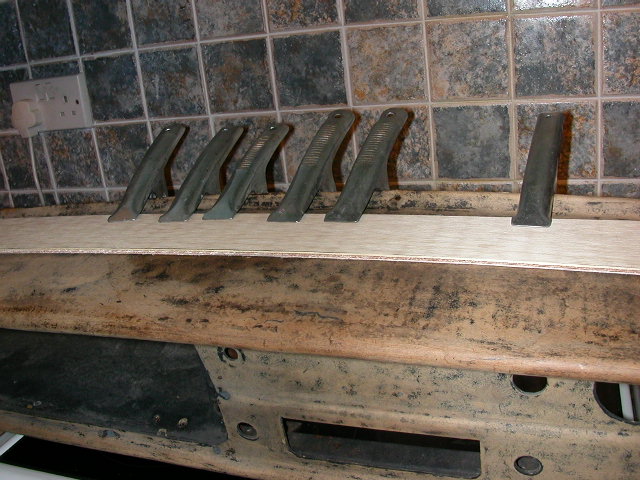
 To remove the warpage, I reasoned that locally wetting the board with warm water would soften it, so this is what I did. Adding a drop of washing up liquid breaks the surface tension, helping the water to penetrate the board. Once I was happy that the board was sufficiently pliable, I clamped the affected area between two strips of thin plywod to hold it in shape while the board dried in it's new (old!) form. So far so good, several minor bulges have already been taken care of, in the pictures I am dealing with a substantial dip in the top surface.
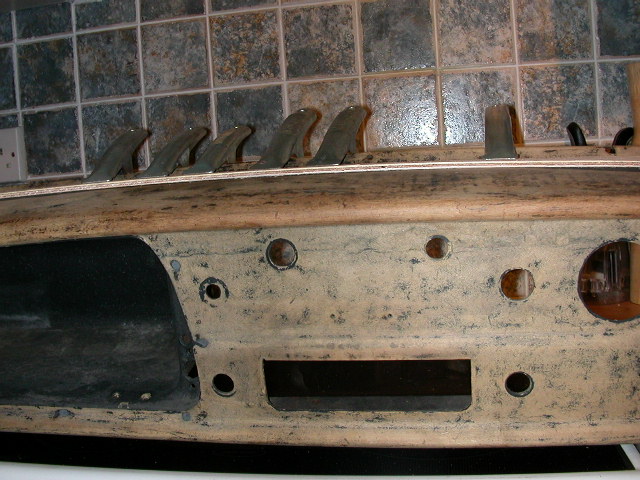
There are a number of small angled blocks of wood which are intended to prevent the lipped edge of the dashboard from collapsing. In practice, these only support the immediate areas where they are located, so big dips form between these areas. I will be adding extra blocks to maintain the correct shape once I am happy with the profile.
Once this stage is complete, I need to restore the damaged areas along the back edge where the dashboard meets the bulkhead. Screws have been pulled through some of their fixing holes here, while the areas around the demister vents have been quite badly torn. I have made some preliminary repairs to restore the structure using nothing more exotic than PVA glue, however I have a more unusual approach in mind to regain strength in these areas.
Cheers,
Bill.
posted by Bill Davies @ 10:11 pm
1 comments
![]()

1 Comments:
Found this link through your rarebits site, and just had to say that I admire greatly your skills and ideas, as well as your determination to repair rather than replace (though i imagine replacing would be harder in this case?)
I haven't the slightest idea how to repair some items on my cars, but i feel the need to repair even though I could buy a replacement. It feels better to keep something with the car that its had all along.
Perhaps some of that sense of what will work, is understanding the materials used to make the parts; there must be a lot of time and dedication that you put in, and that is a fantastic thing to see.
Post a Comment
<< Home